The lists:
Doug: The Cryxian Heavy Coastal Artillery
Pirate Queen Skarre
Kraken
Skarlock
Revenant crew of the Atrementous (10)
Revenant canon
Warwitch siren x2
Iron lich overseer
Mariner x2 (marshalled)
James
Grissel Bloodsong, Fell Caller
Mug
Mauler
Kriel warriors (10)
- UA
- 3 cabers
Fennblades (10)
- UA
Burrowers (6)
War wagon
The board looked really cool, and I'm kicking myself for not taking pictures. From the perspective of my side of the board there was the GF9 Khador Canon terrain piece to the left, to the right were 2 forests, and the center of the board was littered with barrels, hay bales, and other cover. the board itself was one of my Zuzzy mats which I'm painting to look like a field covered in ice and snow.
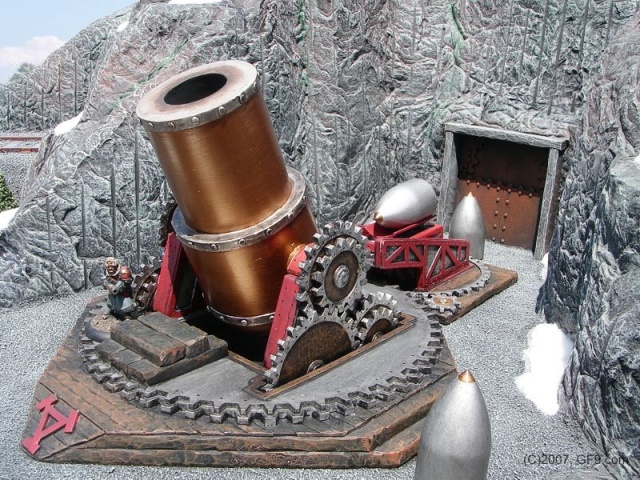
One of these canons.
Deployment went simply. My Kraken pre-deployed dead center to take advantage of the scenario (the one where there are two zones in the center of the board, and you need to control the one on your opponent's side - Onslaught, I think?), while the War Wagon deployed by the Khador Canon to run a hard flank with fire support for all that infantry. I put my revenant canon on the right flank to hide behind a forest (to better keep him protected while benefitting from the Ghost Shot ability), the Iron Lich Overseer (hereafter ILO) left of him with his 2 Mariners B2B, the war witches behind them, the skarlock overe there too, then Skarre just left of the kraken, with rev crew next to her. James basically centered the rest of his army in waves, with Burrowers out front (with AD), kriel warriors behind them, Fennblades behind them, and the warbeasts and Grissel in the back. There was a lot of Troll staring me down, but I had a lot of guns, and my hope was that by going first I could deal with them. Finally I used my tier bonus to Advance Move my Rev Crew and canon forward.
A small boat sailed almost soundlessly toward the frozen shore near the Scarsfell Forest in Khador. The air was crisp with the coming winter, and a few flurries of snows wafted through the air. As the boat approached the shoreline, the water began to froth around them and a huge Kraken surfaced, advancing ahead of the boat and taking its position on land. Moments later two Mariner warjacks also breached the surface, followed by a small horde of ragtag revenants, several of which were hauling one of the cursed canons from the Atrementous. As the boat reached the shore the horned Pirate Queen stepped off, sword and dagger in hand, flanked by a pair of warwitches, a hulking Iron Lich Overseer, and her personal skarlock. Without a word the force began to advance inland, knowing their target was not far away.
Grissel Bloodsong's kin had not fared well these last few days. Several hard-fought battles against Khadorans encroaching on Trollblood lands in the Scarsfell had depleted their numbers, but perhaps even worse their supply of hardy trollkin beer was exhausted. With winter coming on and her people needing her warriors to stay stout of heart, Grissel knew that they would have to move out and acquire more supplies. She had heard about an excellent opportunity - a Khadoran supply depot on the outskirts of the forest, brimming with kegs of beer and food. As an added bonus, this depot was home to a massive Avalanche Canon, in position to shell either the coast or the forest from miles away. Capturing the canon would be a huge asset for her people.
Turn 1 for me was mainly just running up into position. The Kraken went as far forward as he could, the Rev canon entrenched itself out of sight behind the forests where I felt sure that he would get at least a few shots off, the Rev Crew ran up and took position in some barrels for cover. The ILO ran into cover and had the mariners also run up into B2B with him, the warwitches following up behind them. Skarre camped her focus and ran up behind a barrel, the skarlock sacked a rec canon crew member, netting Skarre 4 more focus the following turn. All in all, not too bad. James blitzed everything forward, putting Hoof It on the kriel warriors and running them as far as he could, then running the Fennblades up behind them and following up with his beasts in the back. Burrowers burrowed (like they do) and waited. I've been on the other side of this before, but now I've seen a horde of Trolls with Touch, no KD, and a dangerous level of threat output fly 17" across the board toward me, getting right up in front of my lines. It's terrifying. Finally, the War Wagon lobbed a shot that got a perfect deviation and took out 2 rev crew and the QM (who apparently didn't calculate blast damage into his survival odds when taking cover).
As Grissel's trollkin approached the canon, she could see a grisly sight - Khadoran bodies stewn about and smoke rising from signs of battle. Across the field was a huge mechanikal monstrosity, as well as a collection of other Cryxian tools of war. Forming up quickly, they prepared to charge as the Cryxians whirled about and came for them. Running forward to meet them, Grissel only hoped that the strength of troll flesh would prevail against the fell power of the Cryxians.
 Round 2 is where the fun happened. With kriel warriors up in my grill and already down 3 rev crew, it was time to bring the pain. Skarre had 10 focus, gave 3 to the kraken, and kept the rest. The rev canon blasted 2 kriel warriors (who both failed their tough rolls) and regained its lost crew member. Skarre stayed in her cover and put up Dark Guidance, giving all her Cryxians an extra die to hit in melee, the skarlock sacked the new rev canon guy for the promise of 5 focus next turn for skarre, and then the real guns opened up. One warwitch put a focus on a mariner, the ILO killed a warrior with Dark Fire, netting him a soul, then the mariners fired, forfeiting movement for Rat 7. The tightly clumped kriel warriors took a number of explosions, and with the warwitch focus, the jack marshal boosts, and the ILO's soul, about 5 or so kriel warriors went to meet Dhunia. The Rev Crew accosted themselves stunningly well, with Dark Guidance and Gang allowing them to tear through most of the rest of the unit. They did a little too well, in fact - I had to not take a few attacks, because I wanted there to be kriel warriors for the Kraken to eat! It did that as well, killing the two kriel warriors in range and firing off a relatively ineffectual shot into the troll back lines, but not being far enough forward that Mulg would be able to reach him. All in all I'd killed 13 out of 15 kriel warriors, including all their cabers, and I wasn't in a particularly bad spot.
The Troll retaliation was not too bad. The Burrowers popeed up in front of the Kraken, forfeited their movement, and shot him with slug guns for 9 points of damage. The Fennblades used No Quarter and charged, killing most of the Rev Crew (but not the Quartermaster!) and a warwitch siren, and generally all kinds of up in the way. The last kriel warrior took his swing at the Quartermaster and missed, and the War Wagon had no better luck. Grissel and her beasts advanced up behind the front lines again.
As the Trolls charged forward at the Cryxians, to their horror they saw canons flash and explosion ripple across their lines. Many hardy trollkin were torn apart, somescreaming in agony as their very souls were ripped from them, and some falling victim to the huge Kraken, which stuffed them into the vents on its sides. The undead pirates dispatched many with their pistols and swords, and it wasn't long before Bloodsong's kin began to lose hope. Their countercharge failed to inflict serious damage on the Cryxians, even with their burrowers ambushing the Kraken and firing their slug guns into it. Things looked grim.
Round 3 is where I messed up. I got excited by all the killing happening and forgot one very important thing: if I was going to kill Mulg, I needed to load up the Kraken all the way. I forgot this, and didn't do it. I gave him 1 focus, and apparently just didn't think about it. The rest of the turn went well - the rev canon blew up a few pygs and fennblades, got a crewman back, the skarlock sac'd him to promise Skarre 6 focus next turn, The Mariners blew holes in the Fennblades, all with the intent of clearing a path for the kraken to get to Mulg. They did pretty well, but unlike their Kriel warrior bretheren, the Fennblades were familiar with the "Tough" mechanic, and how to actually make it work. One key fennblade in the way toughed like 3 times in a row. The Rev Crew brought 5 models back to life, all of whom were put into position to inflict serious damage on the Fenns. Skarre moved up to kill a Burrower in the way - in retrospect, not a wise move. Combined with not loading up the kraken, this proved to be my downfall. she popped her feat, used her ample extra focus (still grumbling...) to heal back to full, and had 1 to camp. The Rev Crew, between feat and Dark Guidance, tore through most of the remaining Fenns nearby and were able to put a few pistol shots into knocked down models still blocking the Kraken. In the end, the Kraken was clear to attack Mulg, at ARM 24, and at P+S 25 with his 2 corpses. A second derp on my part meant that I forgot to turn him to face Mulg with BOTH arms...so with only 1 focus and 1 initial on him I didn't seal the deal. 2 attacks at dice+6 (!!!) dealt 12 and 13 damage, respectively, but left him standing well within charge range (or walk range, now that I'd damaged him) of Skarre.
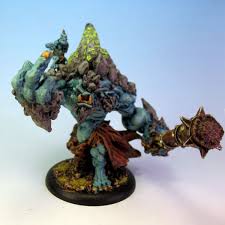
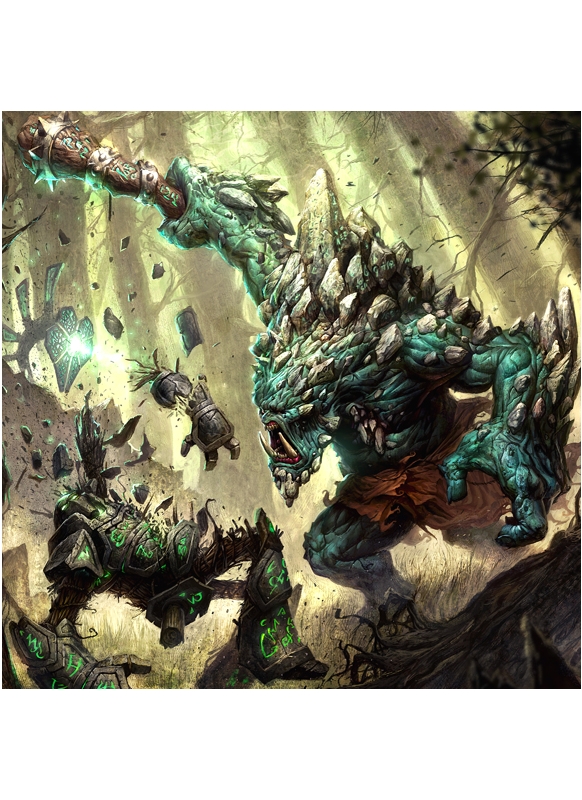
Mulg's response to the Kraken.
James did his part perfectly. Grissel moved up and popped her feat and was able to get Calamity off on Skarre, as well as heal Mulg back to fighting status. The Mauler charged the front of the Kraken to get nice and close to Mulg, then cast his animus on the big guy and tried wrestling the Kraken (at ARM 24 he mostly looked a little silly - the best part being the chain attack, where he opted for an impotent head butt). Then Mulg walked up, needing 7s to hit Skarre and doing dice+3 on each hit. He hit the first one, dealt 14 damage (great time to crank a roll on 2 dice, right?), tried eating a Rev Crew with his free hand, found that the undead are really unappetizing, got extra angry and swung at Skarre again with his free feat attack and missed. One buy later and Skarre was a tree-ka-bob. The Mauler roared triumphantly as the Kraken went down - we figured that the timing had him convinced he wrestled the machine to the ground.
Another wave of explosions rippled through the troll lines, and where before a wall of troll flesh had protected Grissel and her beasts, now only the bodies of the dead and the moans of the dying remained. The horned warcaster summoned powerful fell magics to empower her forces, and the slaughtered Grissel's kin with gleeful abandon, the towering Kraken striding forward to inflict horrible lashes into Mulg's hide. Grissel saw her chance, though, even wounded as Mulg was. She charged forward and let out a mighty fell chorus that strengthened her kin and weakened their enemies. She invoked magic of her own to weaken the horned warcaster, and with mighty roars her beasts charged. Her mauler swung at the great colossal with all his might, eventually grabbing onto its legs and smashing his head against it in an attempt to bring it down. Mulg could see more clearly, though. Through the haze of pain he ignored the huge Kraken and advanced to the Satyxis, bringing his club down to shatter her power field, then with a mighty swing smashing her straight backwards into a copse of trees, losing sight of her. The Kraken immediately faltered and slumped, the Mauler doing its best to wrestle the great thing to the ground and roaring in triumph. The remaining Cryxian forces quickly began retreating, a few parting shots to discourage pursuit. Grissel surveyed the battlefield. Many of her warriors were dead or dying, though some would recover with food and drink. The depot was packed with supplies, and she knew that if they moved quickly many of her kin would live to fight another day.
This game was really fun. Even though I lost the idea of having a Cryx gunline was silly and fun. I need more practice with my Kraken (this makes exactly the second game I've used him), but I think with better application this list has serious tournament potential. It has a very long reach with its guns, it hits like a monster in melee, and it can deal with a lot of issues on the other side of the table. Even with no corpses the Kraken hits at P+S 23 on feat turn, and with 3 focus and Dark Guidance that is enough to put some serious hurt out. A few corpses will have him hitting much harder, and the Rev crew with P+S 16 swords in melee with gang are good backup, to say nothing of the potential to charge the Mariners in. The ILO ended up being very good, and I was able to use him and the Mariners as powerful and accurate backfield artillery pieces. The Revenant canon likewise did very well, killing several models and proving to be an excellent choice for Skarre's sacrifical strike. I'll test this list some more, but if nothing else the "fun" factor was incredibly high.
Grissel Bloodsong's kin had not fared well these last few days. Several hard-fought battles against Khadorans encroaching on Trollblood lands in the Scarsfell had depleted their numbers, but perhaps even worse their supply of hardy trollkin beer was exhausted. With winter coming on and her people needing her warriors to stay stout of heart, Grissel knew that they would have to move out and acquire more supplies. She had heard about an excellent opportunity - a Khadoran supply depot on the outskirts of the forest, brimming with kegs of beer and food. As an added bonus, this depot was home to a massive Avalanche Canon, in position to shell either the coast or the forest from miles away. Capturing the canon would be a huge asset for her people.
Turn 1 for me was mainly just running up into position. The Kraken went as far forward as he could, the Rev canon entrenched itself out of sight behind the forests where I felt sure that he would get at least a few shots off, the Rev Crew ran up and took position in some barrels for cover. The ILO ran into cover and had the mariners also run up into B2B with him, the warwitches following up behind them. Skarre camped her focus and ran up behind a barrel, the skarlock sacked a rec canon crew member, netting Skarre 4 more focus the following turn. All in all, not too bad. James blitzed everything forward, putting Hoof It on the kriel warriors and running them as far as he could, then running the Fennblades up behind them and following up with his beasts in the back. Burrowers burrowed (like they do) and waited. I've been on the other side of this before, but now I've seen a horde of Trolls with Touch, no KD, and a dangerous level of threat output fly 17" across the board toward me, getting right up in front of my lines. It's terrifying. Finally, the War Wagon lobbed a shot that got a perfect deviation and took out 2 rev crew and the QM (who apparently didn't calculate blast damage into his survival odds when taking cover).
As Grissel's trollkin approached the canon, she could see a grisly sight - Khadoran bodies stewn about and smoke rising from signs of battle. Across the field was a huge mechanikal monstrosity, as well as a collection of other Cryxian tools of war. Forming up quickly, they prepared to charge as the Cryxians whirled about and came for them. Running forward to meet them, Grissel only hoped that the strength of troll flesh would prevail against the fell power of the Cryxians.
Round 2 is where the fun happened. With kriel warriors up in my grill and already down 3 rev crew, it was time to bring the pain. Skarre had 10 focus, gave 3 to the kraken, and kept the rest. The rev canon blasted 2 kriel warriors (who both failed their tough rolls) and regained its lost crew member. Skarre stayed in her cover and put up Dark Guidance, giving all her Cryxians an extra die to hit in melee, the skarlock sacked the new rev canon guy for the promise of 5 focus next turn for skarre, and then the real guns opened up. One warwitch put a focus on a mariner, the ILO killed a warrior with Dark Fire, netting him a soul, then the mariners fired, forfeiting movement for Rat 7. The tightly clumped kriel warriors took a number of explosions, and with the warwitch focus, the jack marshal boosts, and the ILO's soul, about 5 or so kriel warriors went to meet Dhunia. The Rev Crew accosted themselves stunningly well, with Dark Guidance and Gang allowing them to tear through most of the rest of the unit. They did a little too well, in fact - I had to not take a few attacks, because I wanted there to be kriel warriors for the Kraken to eat! It did that as well, killing the two kriel warriors in range and firing off a relatively ineffectual shot into the troll back lines, but not being far enough forward that Mulg would be able to reach him. All in all I'd killed 13 out of 15 kriel warriors, including all their cabers, and I wasn't in a particularly bad spot.The Troll retaliation was not too bad. The Burrowers popeed up in front of the Kraken, forfeited their movement, and shot him with slug guns for 9 points of damage. The Fennblades used No Quarter and charged, killing most of the Rev Crew (but not the Quartermaster!) and a warwitch siren, and generally all kinds of up in the way. The last kriel warrior took his swing at the Quartermaster and missed, and the War Wagon had no better luck. Grissel and her beasts advanced up behind the front lines again.
As the Trolls charged forward at the Cryxians, to their horror they saw canons flash and explosion ripple across their lines. Many hardy trollkin were torn apart, somescreaming in agony as their very souls were ripped from them, and some falling victim to the huge Kraken, which stuffed them into the vents on its sides. The undead pirates dispatched many with their pistols and swords, and it wasn't long before Bloodsong's kin began to lose hope. Their countercharge failed to inflict serious damage on the Cryxians, even with their burrowers ambushing the Kraken and firing their slug guns into it. Things looked grim.
Round 3 is where I messed up. I got excited by all the killing happening and forgot one very important thing: if I was going to kill Mulg, I needed to load up the Kraken all the way. I forgot this, and didn't do it. I gave him 1 focus, and apparently just didn't think about it. The rest of the turn went well - the rev canon blew up a few pygs and fennblades, got a crewman back, the skarlock sac'd him to promise Skarre 6 focus next turn, The Mariners blew holes in the Fennblades, all with the intent of clearing a path for the kraken to get to Mulg. They did pretty well, but unlike their Kriel warrior bretheren, the Fennblades were familiar with the "Tough" mechanic, and how to actually make it work. One key fennblade in the way toughed like 3 times in a row. The Rev Crew brought 5 models back to life, all of whom were put into position to inflict serious damage on the Fenns. Skarre moved up to kill a Burrower in the way - in retrospect, not a wise move. Combined with not loading up the kraken, this proved to be my downfall. she popped her feat, used her ample extra focus (still grumbling...) to heal back to full, and had 1 to camp. The Rev Crew, between feat and Dark Guidance, tore through most of the remaining Fenns nearby and were able to put a few pistol shots into knocked down models still blocking the Kraken. In the end, the Kraken was clear to attack Mulg, at ARM 24, and at P+S 25 with his 2 corpses. A second derp on my part meant that I forgot to turn him to face Mulg with BOTH arms...so with only 1 focus and 1 initial on him I didn't seal the deal. 2 attacks at dice+6 (!!!) dealt 12 and 13 damage, respectively, but left him standing well within charge range (or walk range, now that I'd damaged him) of Skarre.
Mulg's response to the Kraken.
James did his part perfectly. Grissel moved up and popped her feat and was able to get Calamity off on Skarre, as well as heal Mulg back to fighting status. The Mauler charged the front of the Kraken to get nice and close to Mulg, then cast his animus on the big guy and tried wrestling the Kraken (at ARM 24 he mostly looked a little silly - the best part being the chain attack, where he opted for an impotent head butt). Then Mulg walked up, needing 7s to hit Skarre and doing dice+3 on each hit. He hit the first one, dealt 14 damage (great time to crank a roll on 2 dice, right?), tried eating a Rev Crew with his free hand, found that the undead are really unappetizing, got extra angry and swung at Skarre again with his free feat attack and missed. One buy later and Skarre was a tree-ka-bob. The Mauler roared triumphantly as the Kraken went down - we figured that the timing had him convinced he wrestled the machine to the ground.
Another wave of explosions rippled through the troll lines, and where before a wall of troll flesh had protected Grissel and her beasts, now only the bodies of the dead and the moans of the dying remained. The horned warcaster summoned powerful fell magics to empower her forces, and the slaughtered Grissel's kin with gleeful abandon, the towering Kraken striding forward to inflict horrible lashes into Mulg's hide. Grissel saw her chance, though, even wounded as Mulg was. She charged forward and let out a mighty fell chorus that strengthened her kin and weakened their enemies. She invoked magic of her own to weaken the horned warcaster, and with mighty roars her beasts charged. Her mauler swung at the great colossal with all his might, eventually grabbing onto its legs and smashing his head against it in an attempt to bring it down. Mulg could see more clearly, though. Through the haze of pain he ignored the huge Kraken and advanced to the Satyxis, bringing his club down to shatter her power field, then with a mighty swing smashing her straight backwards into a copse of trees, losing sight of her. The Kraken immediately faltered and slumped, the Mauler doing its best to wrestle the great thing to the ground and roaring in triumph. The remaining Cryxian forces quickly began retreating, a few parting shots to discourage pursuit. Grissel surveyed the battlefield. Many of her warriors were dead or dying, though some would recover with food and drink. The depot was packed with supplies, and she knew that if they moved quickly many of her kin would live to fight another day.
This game was really fun. Even though I lost the idea of having a Cryx gunline was silly and fun. I need more practice with my Kraken (this makes exactly the second game I've used him), but I think with better application this list has serious tournament potential. It has a very long reach with its guns, it hits like a monster in melee, and it can deal with a lot of issues on the other side of the table. Even with no corpses the Kraken hits at P+S 23 on feat turn, and with 3 focus and Dark Guidance that is enough to put some serious hurt out. A few corpses will have him hitting much harder, and the Rev crew with P+S 16 swords in melee with gang are good backup, to say nothing of the potential to charge the Mariners in. The ILO ended up being very good, and I was able to use him and the Mariners as powerful and accurate backfield artillery pieces. The Revenant canon likewise did very well, killing several models and proving to be an excellent choice for Skarre's sacrifical strike. I'll test this list some more, but if nothing else the "fun" factor was incredibly high.
No comments:
Post a Comment